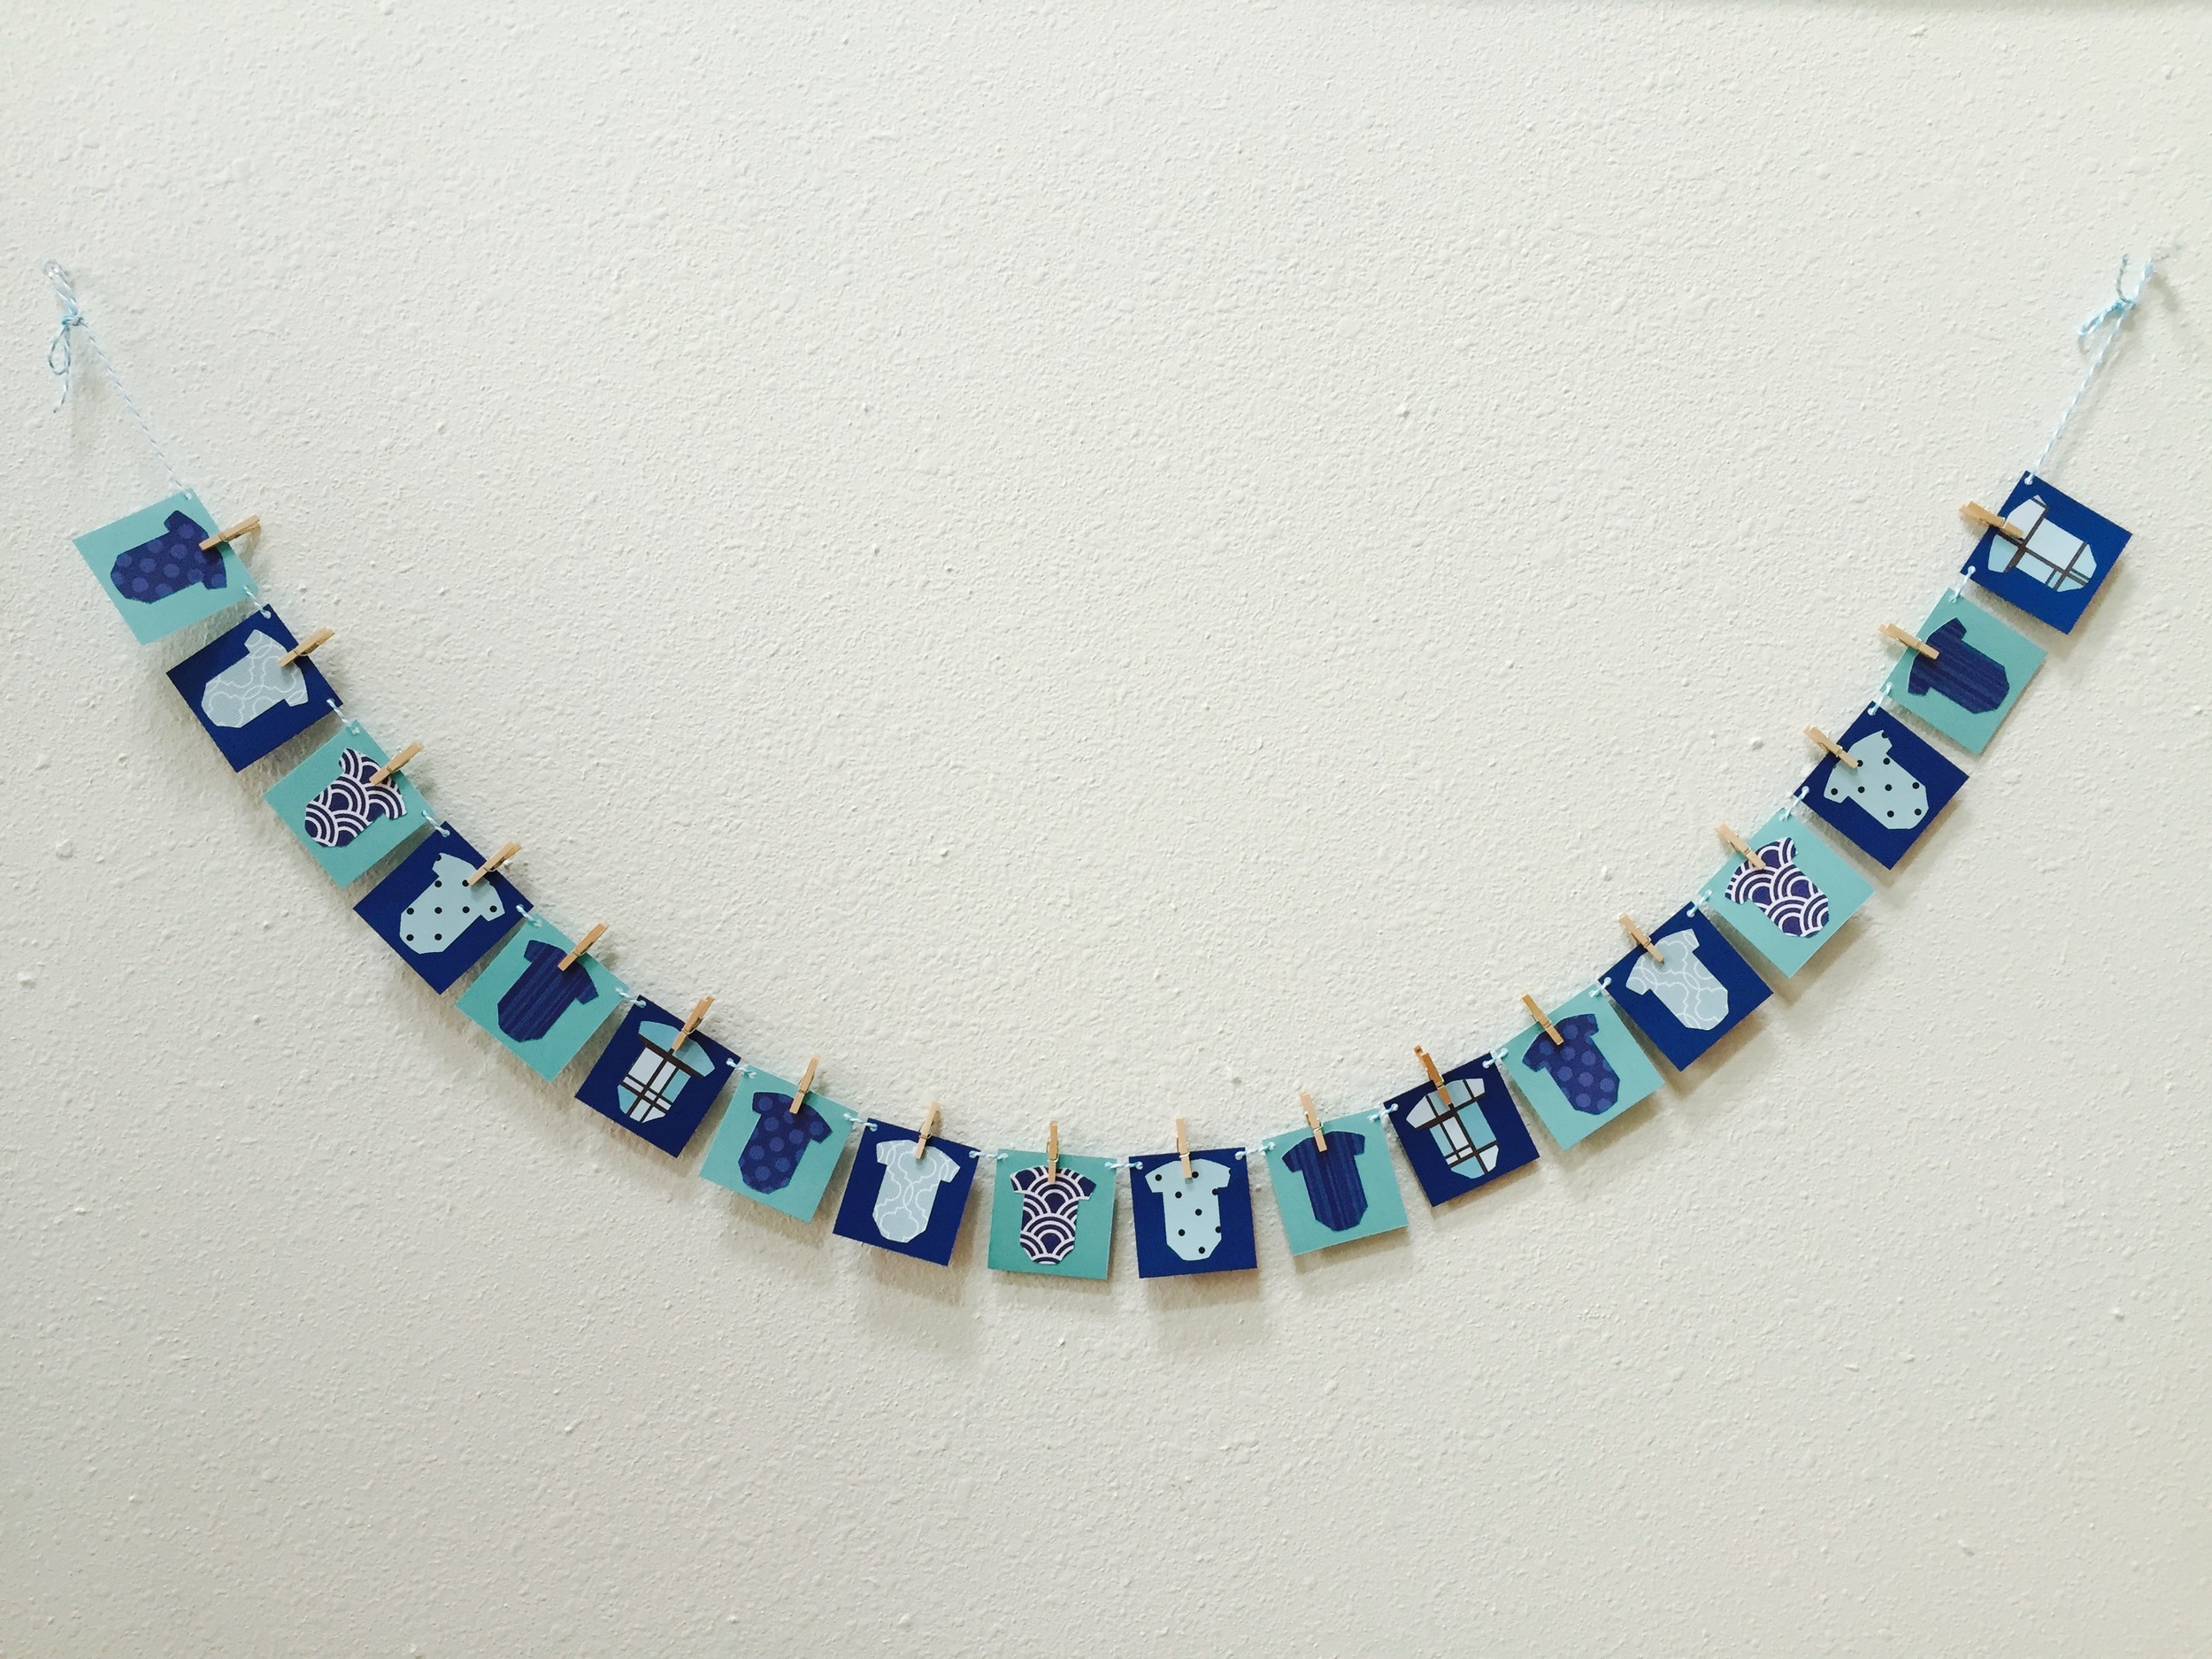
Onesie Garland

My friend Meridith is expecting a baby boy later this month, and I wasn't able to make it to her shower. Similar to my Bridal Shower In a Box project, I wanted to send something special in addition to a gift from her registry. I love all the different versions of onesie garlands that are so popular for baby showers, and decided to make her one with a navy blue and turquoise theme.

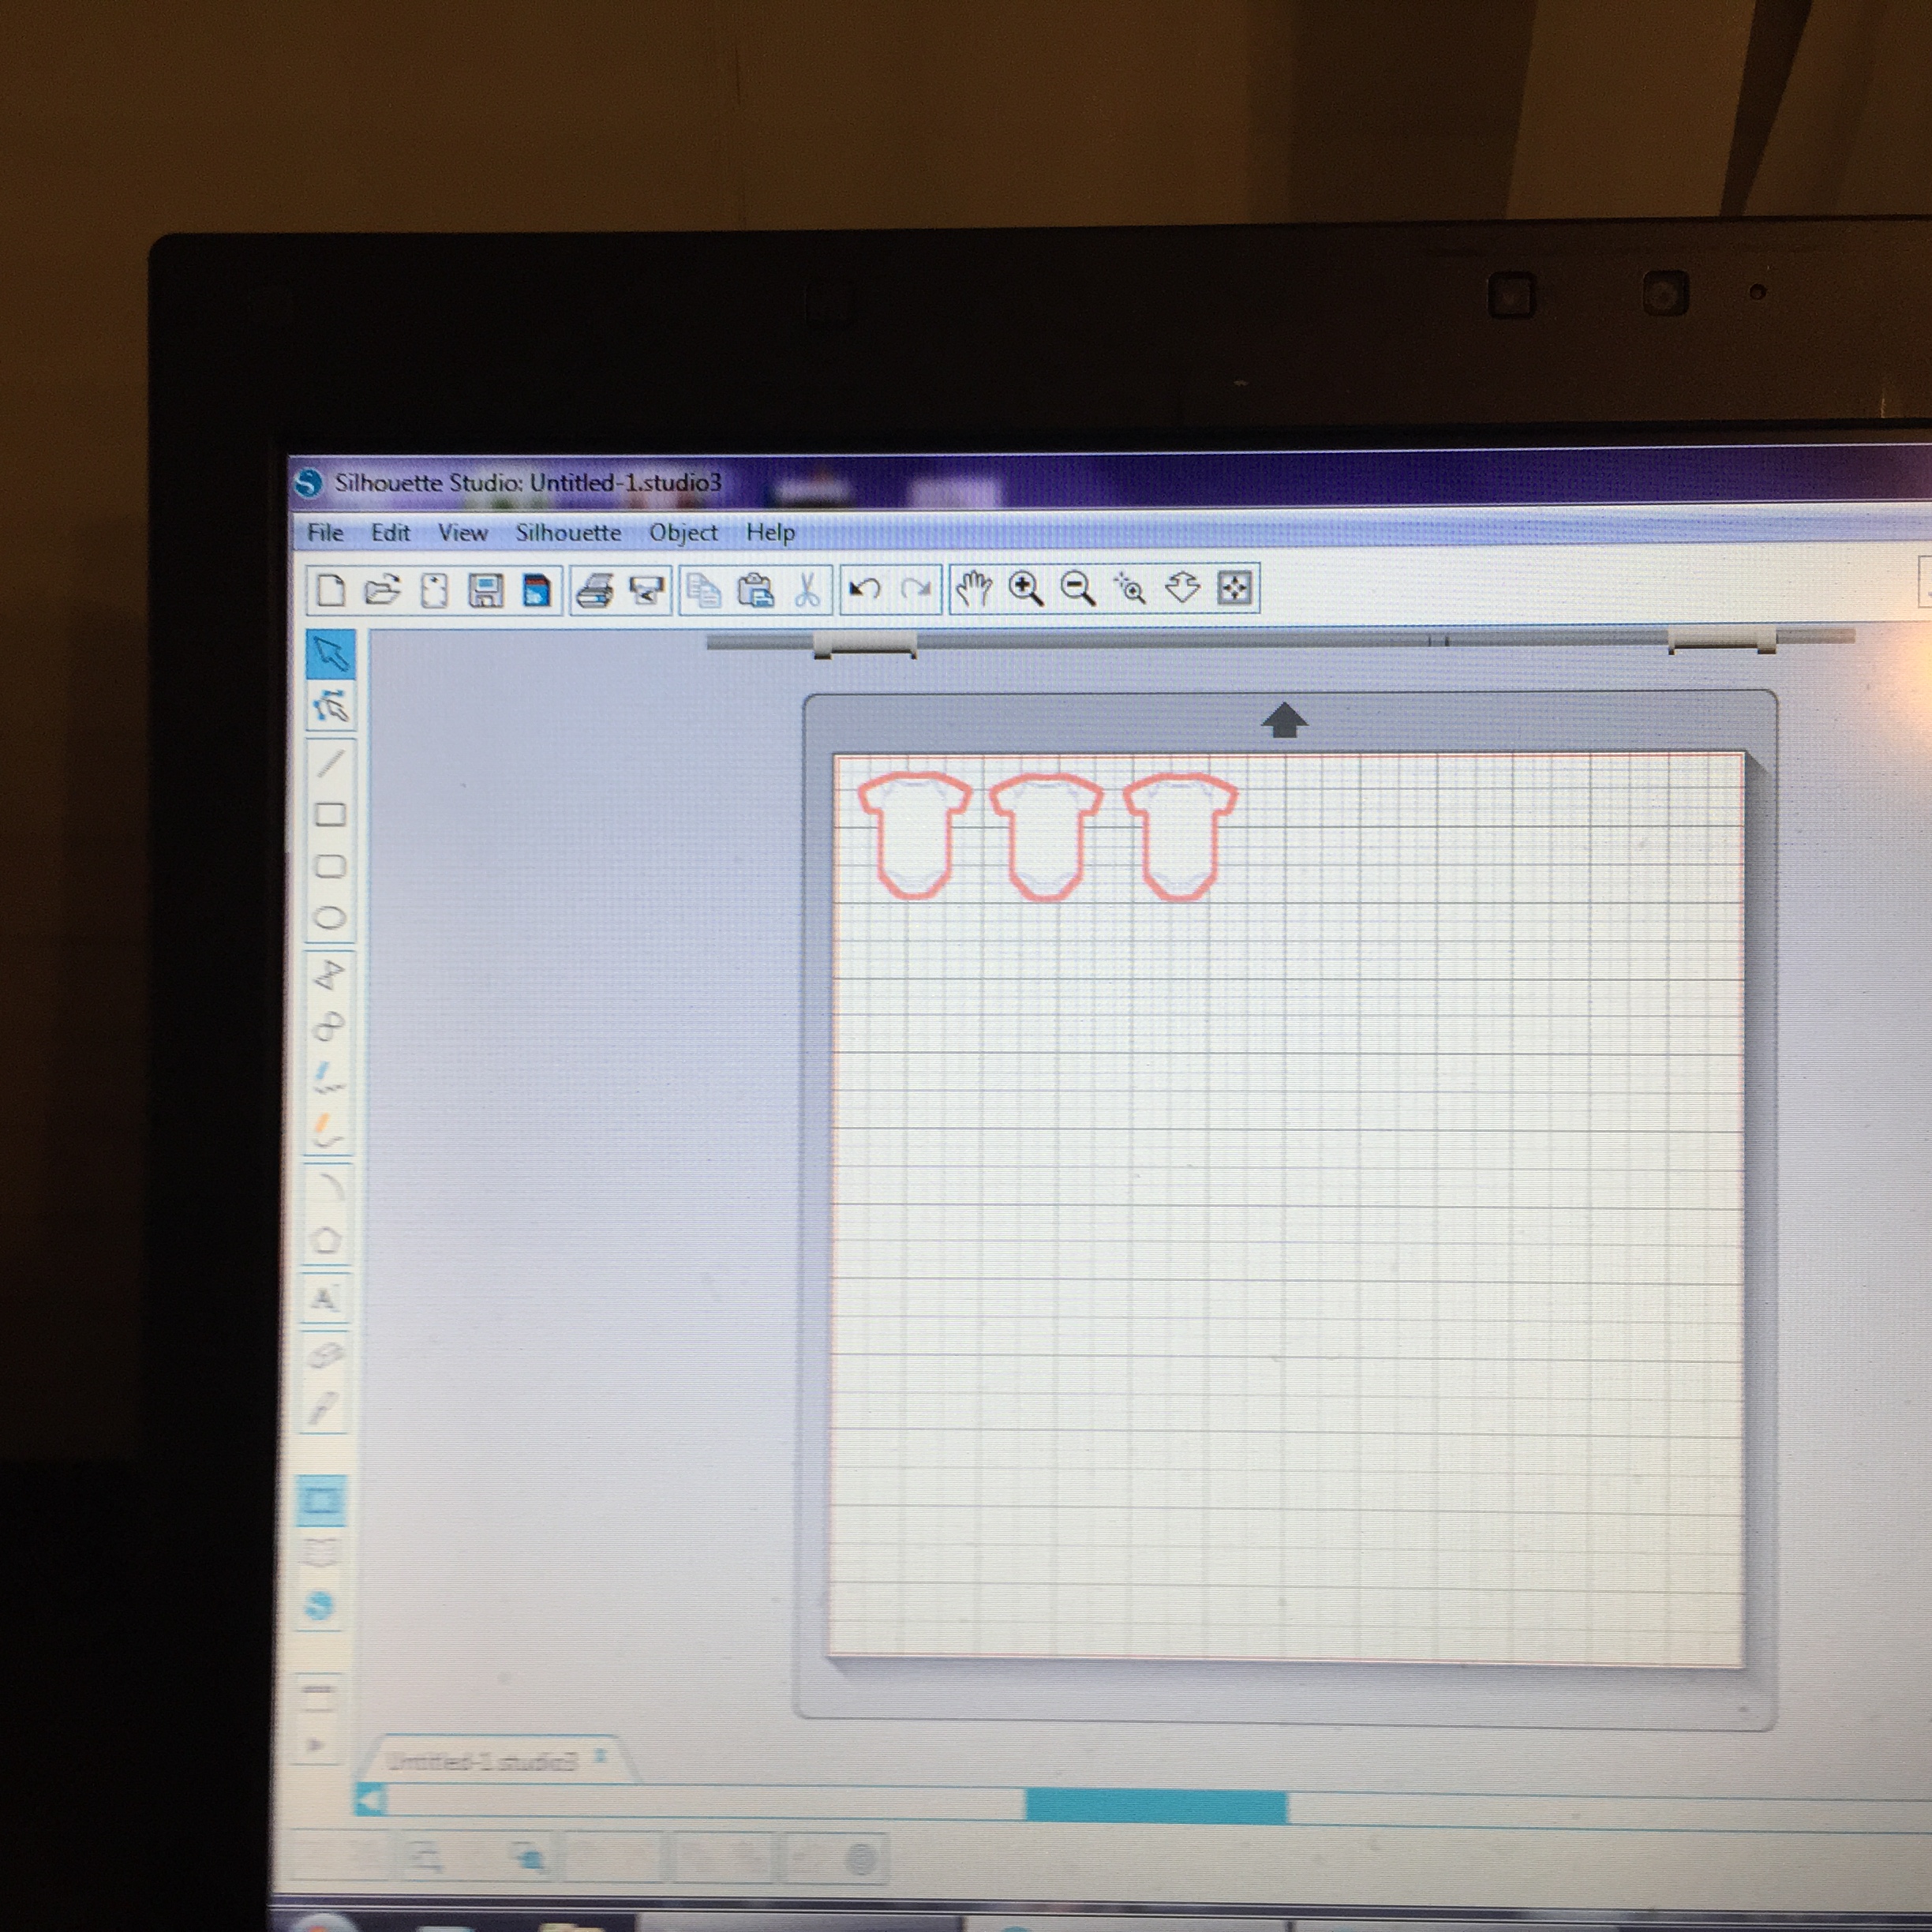
I used my Silhouette Cameo again for this project. I love how much time it saves me, and the endless possibilities with the cutting tool and sketch pens.

After gluing the onesies to the blue and turquoise squares, I used my 1/8 inch circle punch to make the holes to string the banner.

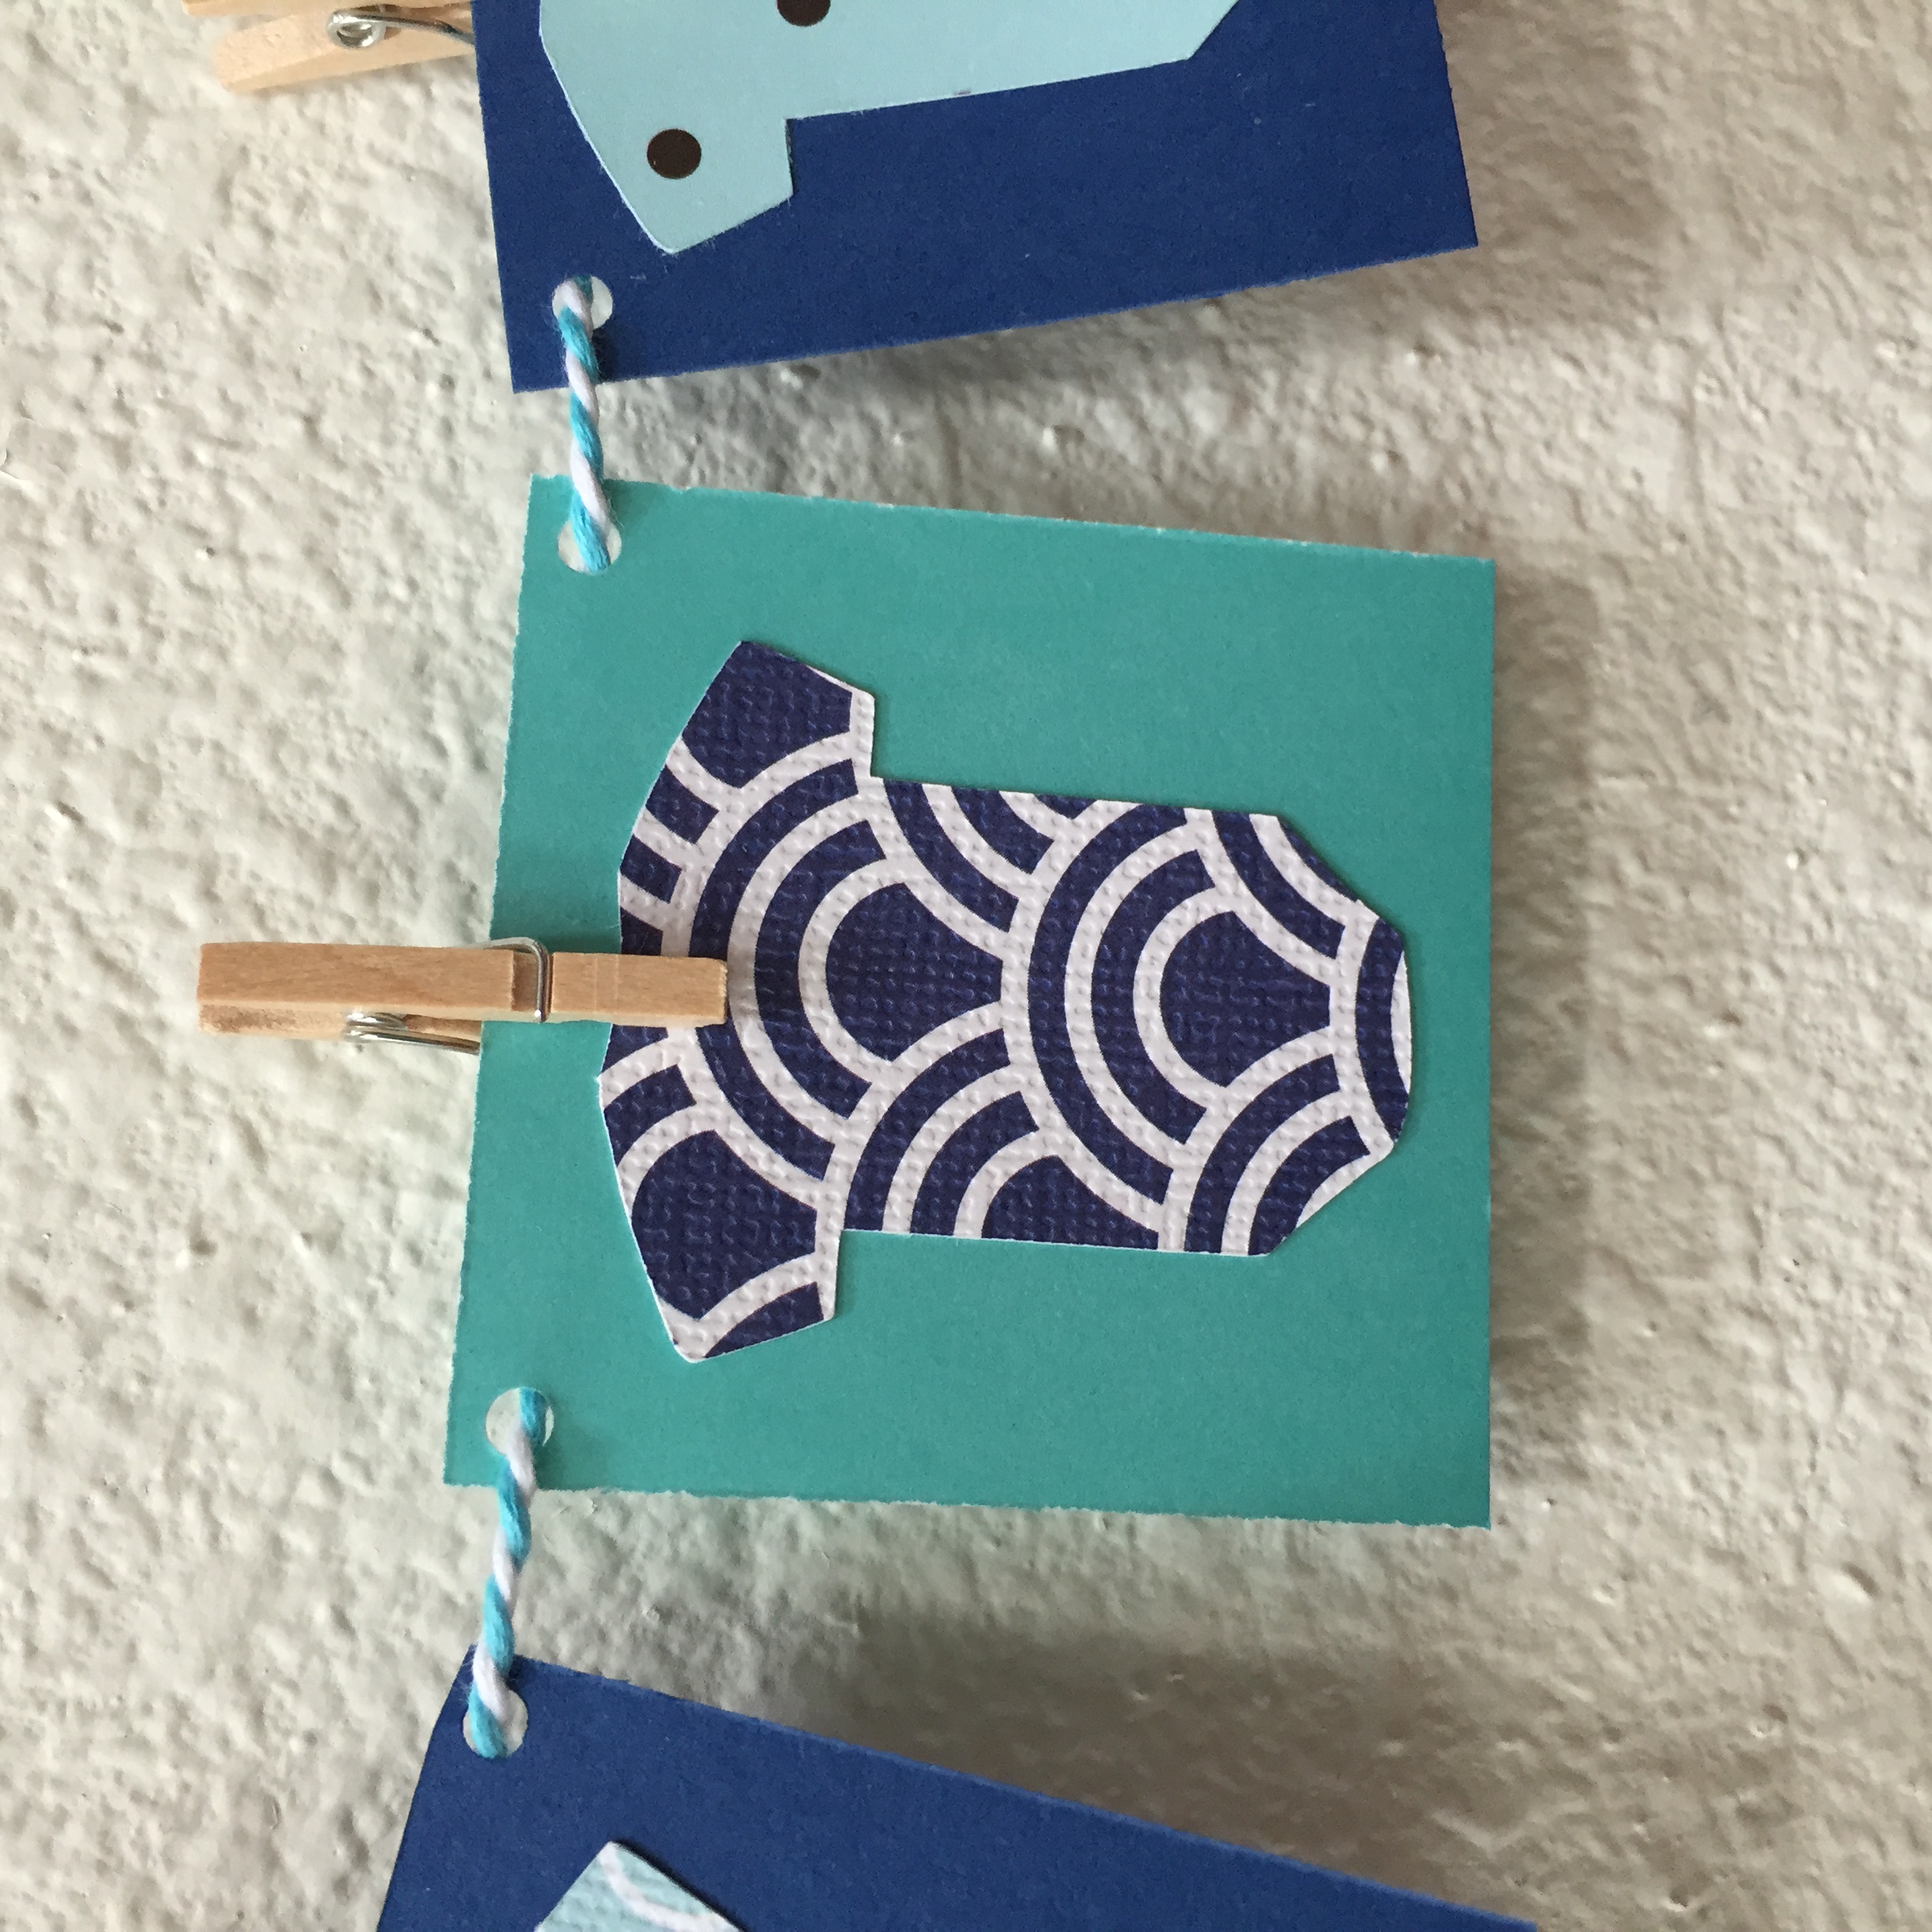
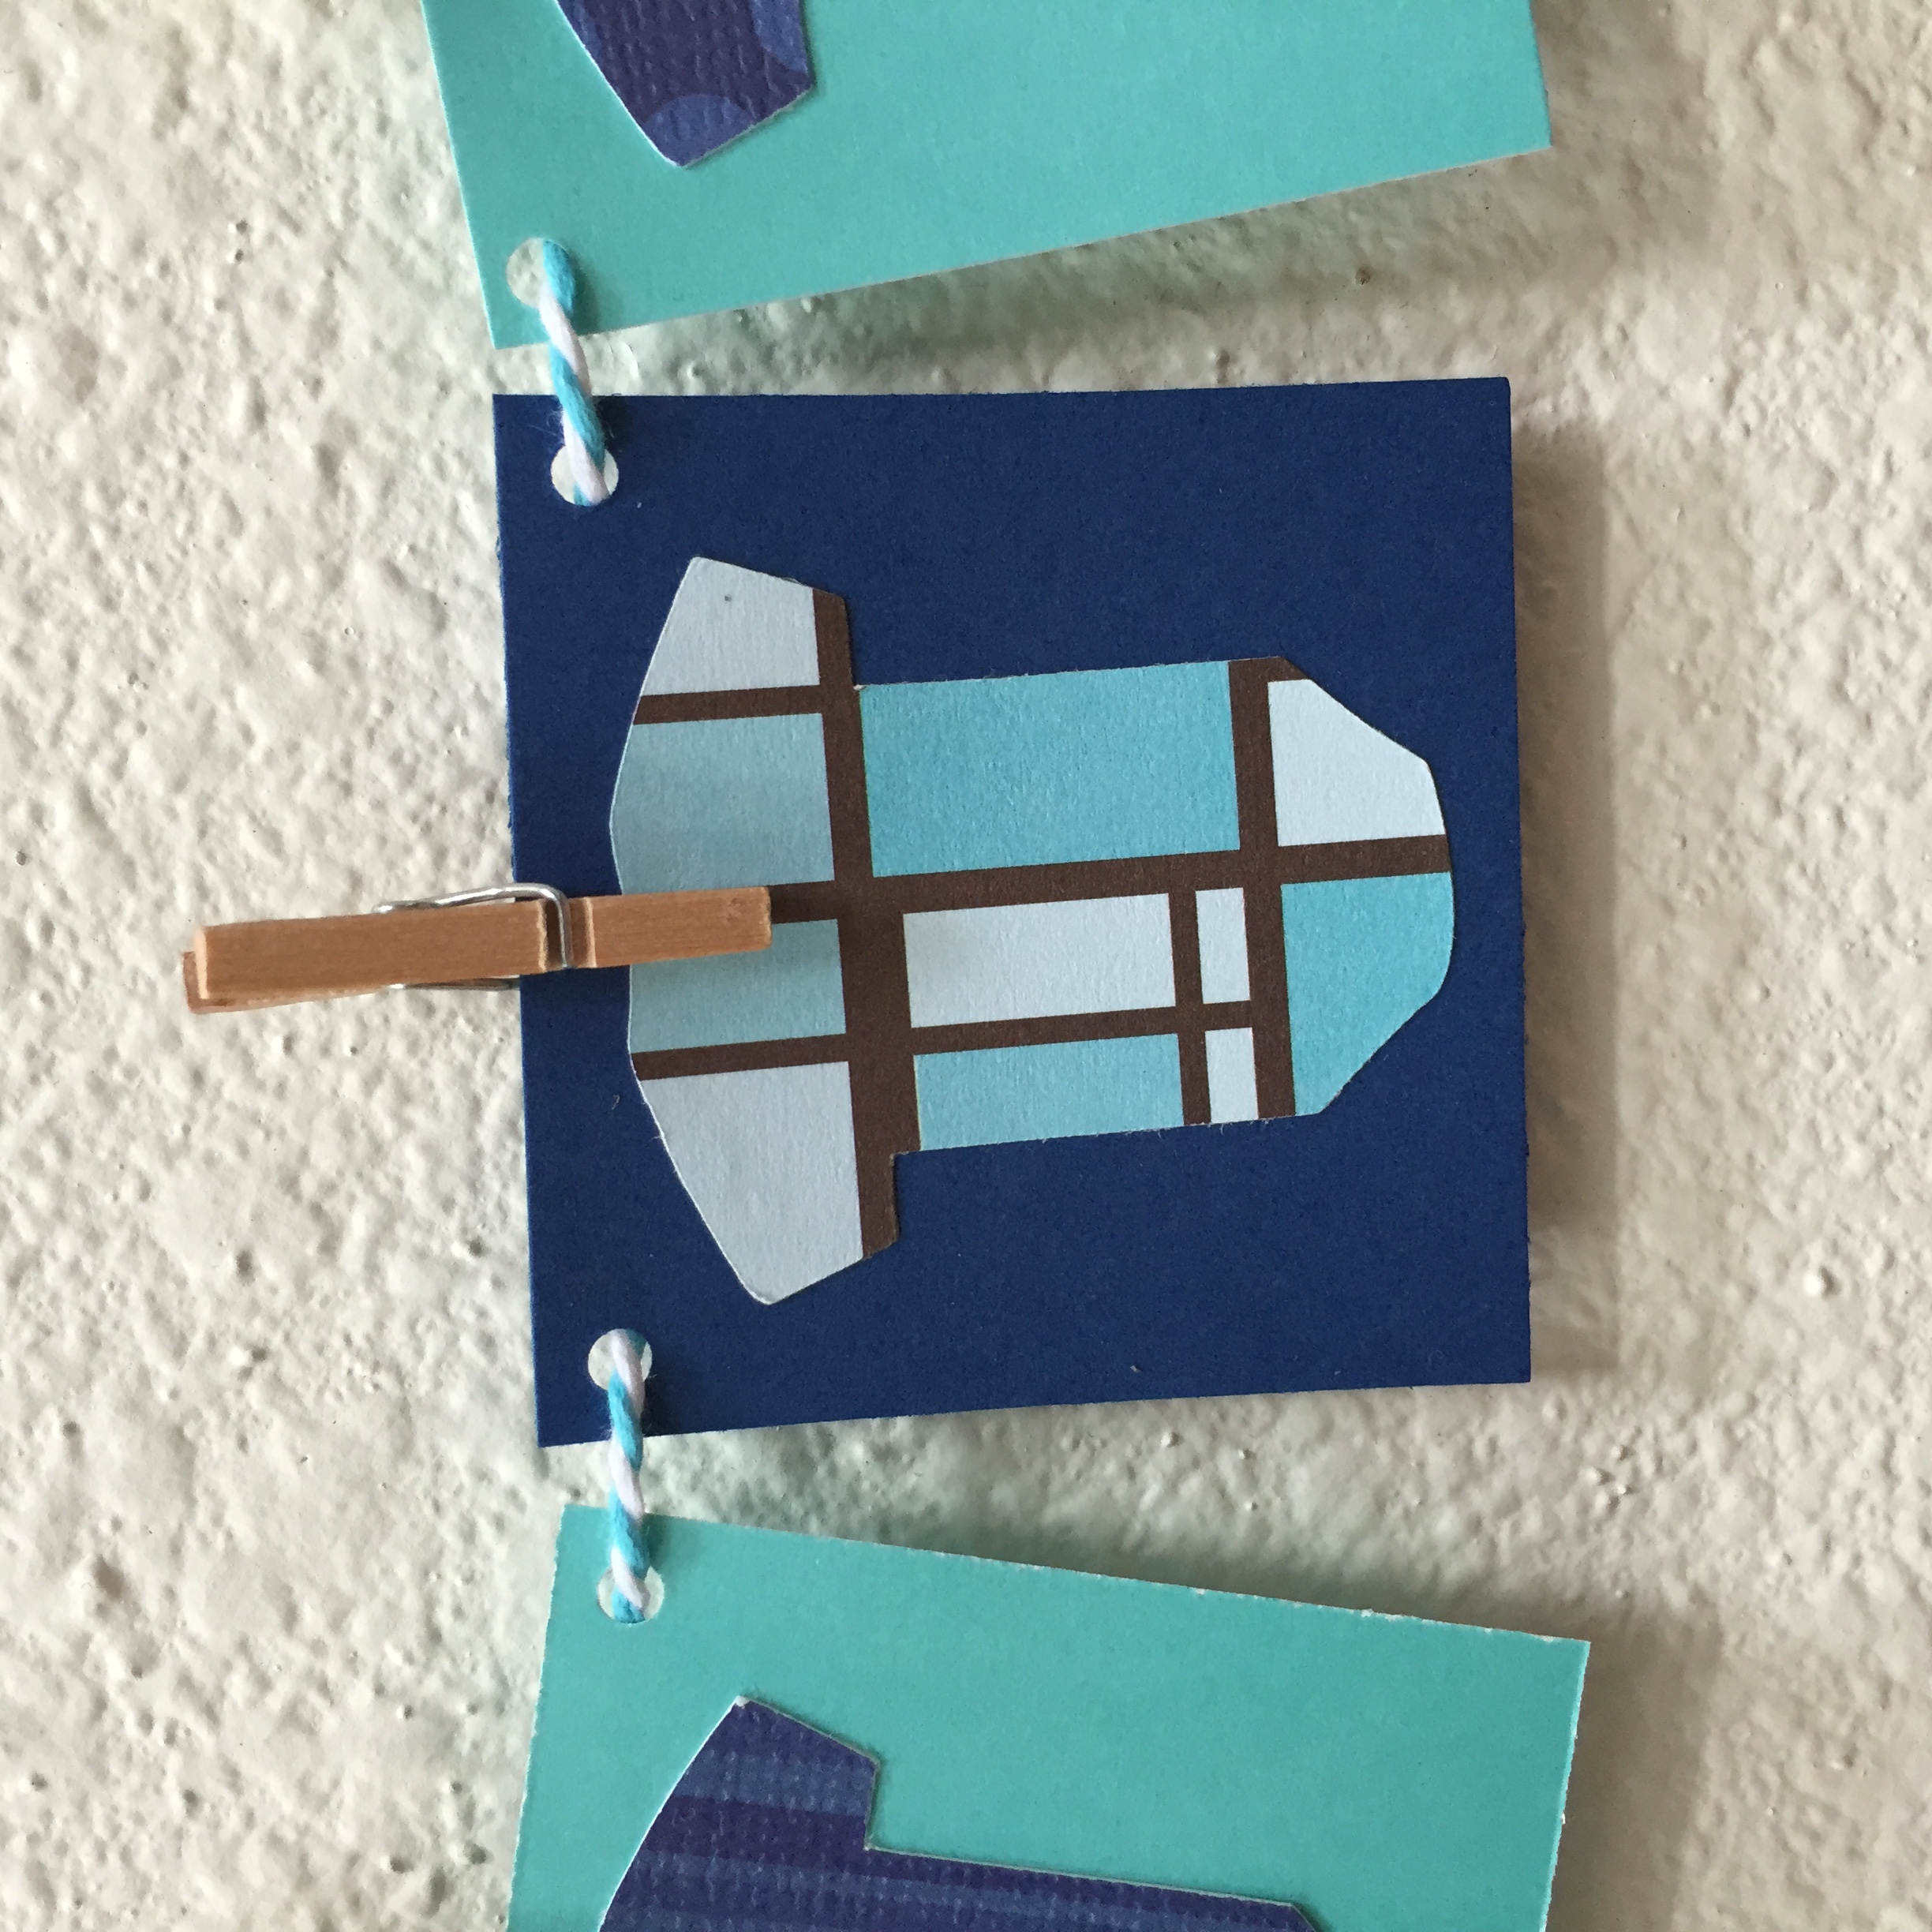
I added miniature clothespins to give the banner more character.

I can't wait to meet her new little one!

Good Luck Running Banner

Two of my friends from college ran a half-marathon in Vancouver, B.C. last weekend. Contrary to popular belief, Hallmark does not sell "Good Luck on your half-marathon" cards, so this is what I came up with to show my support!

I started with my basic banner format, quickly and easily cutting out the letters thanks to my Silhouette Cameo. I strung the banner on a shoe-lace to add to the running shoe theme. I wanted a fun colored shoe lace, but didn't have much luck or time after a four store scavenger hunt. The ones I ended up with were at least 50 % off!

My vision for the running shoes involved bright, vibrant colors. Jen has this gorgeous pair of very neon Nike running shoes. When we were in Albuquerque on the shuttle bus to our rental car, the woman sitting across from us spotted them, and said with utter disgust, "wow, your shoes are green!" Since then we've used any opportunity to poke fun at brightly colored tennis shoes, and I thought they were just what these banners needed.

I used my Silhouette Cameo Sketch Pens to trace the shoe clipart images, then the cutting tool for the shoe outlines.

I played with adding shoelaces to the shoes, but ultimately felt the design started to get too busy. I thought they turned out really cute, and may use them for another project.

I struggled with attaching the shoes to the banner. I had considered connecting the shoes on their own string, and making a double banner but the shoe line kept twirling. Next time I'll either make the shoes double sided, or place the letters directly on the shoes.

Hopefully in the very near future they'll enter a triathlon so I can also bedazzle a banner with neon bicycles and swimsuits. 

Hippity Hoppity Easter's On Its Way

Hello friends! After looking out at the non-stop pouring rain the last few days, I was inspired by the gorgeous pastel hues that I associate with Easter eggs to brighten up my dreary weekend. Since it's too early to dye eggs, I decided to make some egg banner decorations. Random family fact...we only ate egg salad once per year as a result of the post egg hunt hard boiled egg surplus. It wasn't until my adult life that I realized the amazing egg salad sandwich truly is available year round. I regularly order it for lunch at work since I was so deprived as a child.

I started with my Cameo Silhouette, and using the trick from my St. Patrick's Day post to trace remove portions of images, ended up with the perfect Easter egg in a variety of sizes.

I always enjoy playing with different color patterns. It reminds me of Elementary School art class.

I used my trusty hot glue gun to affix the eggs to scraps of ribbon.

I'm so excited to be heading down to New Orleans and San Diego this week. Trip highlights to come in future posts! I'll be reading up on Martha Stewart's 2015 Easter tips on the plane. Have fun with your Easter preparations!

St. Patrick's Day Snail Mail

St. Patrick's Day is quickly approaching and I've spend the last few weeks creating a snail mail surprise for the special kiddos in my life. The process involved a number of learning experiences, and I'm happy with how they turned out!

At Craft Day I was inspired by rainbow colors, and started playing with my circle and heart punches in all the beautiful hues. 

I tried hole punching and stringing the pieces together, but wasn't happy with the overall effect. Jen encouraged me to try sewing them together for my own paper garland, and guided me through the process. It was much easier than I expected, and I absolutely learned from my mistakes so I know how to make them straighter next time. Hopefully the recipients won't look too closely.

spd7.jpg

Next I started playing with my Silhouette Cameo to make clouds for the top of the rainbow. I was able to teach myself how to use the trace feature to edit and cut out portions of google clip art images.

I wanted to make it obvious which shape to start with to showcase the full burst of colors when the rainbow was pulled out of the box.

I stopped by our local Party City and was able to find the gold coins, black pots, green goodies, and treat boxes thanks to the help of our cousin Brianne.

Here's the full effect in stages.

I also chose to enclose a leprechaun note for each kiddo.

This project was so much fun, and I loved looking at all the rainbow colors. I can't wait to mail them off this week. Next Tuesday, I hope you find a gigantic pot of gold at the end of your rainbow. Have fun celebrating!

Balloon Banner

Our fabulous Aunt Dianne celebrated her 70th birthday a few weeks ago. I've had some birthday banner ideas I'd been wanting to experiment with, and this was the perfect opportunity. I envisioned large circles in vibrant colors with contrasting colors of grosgrain ribbon as the balloons, and bold letters spelling out Happy Birthday.

I was inspired by some glittery paper I had stashed in my craft supplies, and used my 2 inch circle punch for the balloon outlines.

I utilized my adhesive paper and Silhouette to make my own sticker lettering. It was incredibly easy, and I was delighted with how well it worked.

I played around with several of the colored ribbons and felt they overwhelmed the smaller circles.

Instead, I used my supply of baker's twine.

Next time, I think I'll make the circles significantly larger and experiment with the ribbon again. This size turned out better than I thought, and was the ideal size to mail.

I also had some fun decorating one of her gift bags with my balloon punch.

On another note, I have a quick follow up on my Valentine's Day post. I received two incredible valentines.

Valentine #1 - Sent by Rachel in Maryland. The inside says "Wool you be my valentine?" So clever!

Valentine #2 received from Anna in Tasmania, Australia. I was thrilled to receive an international valentine, and thought her use of hearts to create this scene was genius!

I loved the valentines I received, and can't wait to participate in next year's swap!